
For this I'll be breaking down the process of what goes into creating an efficient level pipeline with these tools.
Unreal Engine 4 is our engine of choice for this project. Wanting to capture the look of Quake 1 and Hexen 2, using a level editor that worked for those games is a great choice. Trenchbroom is a powerful tool for quickly assembling a Quake map, and with the HammUEr plugin for UE4 importing those levels is as easy as the push of a button once you understand a few basic rules.
The Setup
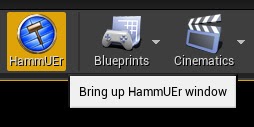
With the plugin installed to UE4, the HammUEr icon will appear in the top toolbar.
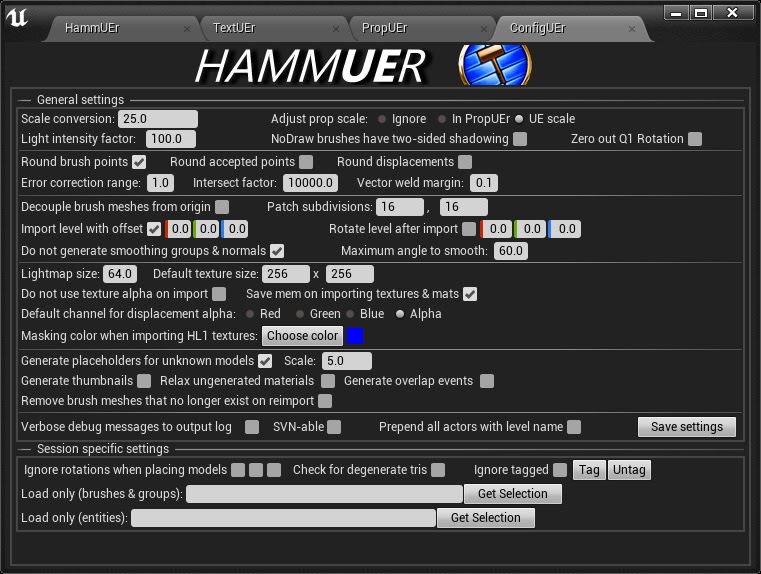
ConfigUEr
The Config tab includes most setup of options, and I'll only cover a few important ones for us.
We use 25.0 Scale conversion. Compared to the units in UE4, the Quake player is quite small. This adjustment increases the scale of brushes created in Trenchbroom to more accurately match UE4's First Person Template scale and maintains the texture resolution.
Zero out Q1 Rotation. For those familiar, there's Standard and Valve mode. The latter allows for more custom control of texture alignment (UVs). This box must be checked if the map uses Valve mode or the texture alignment on brushes may end up destroyed.
Most other settings can be left default. Lowering Error Correction Rage can improve importing odd angled brushes. Decouple brush meshes from Origin will set their pivot to the center of the brush when imported.
These settings are retained in the hammUErPlugin.cfg file. Once setup for a project they likely won’t need to be touched again, but always be sure to check.
PropUEr
We don't use the PropUEr tab as that's more for bringing in more modern maps from Source which use meshes.
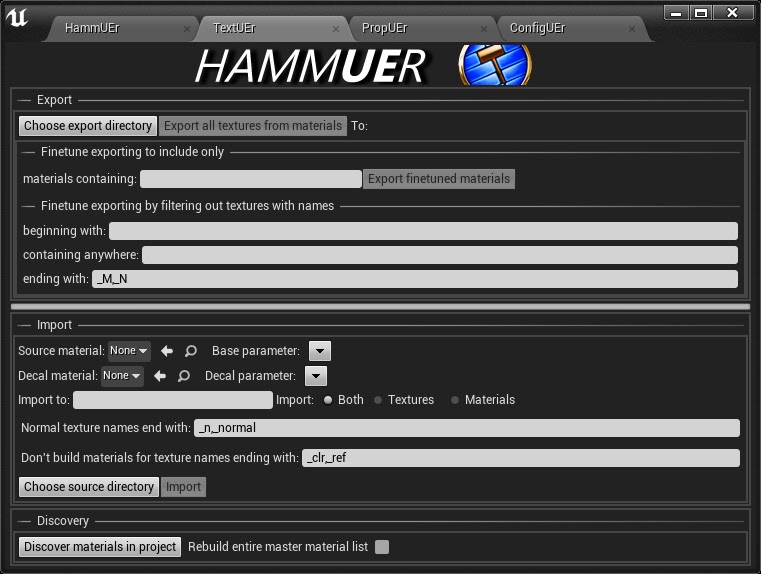
TextUEr
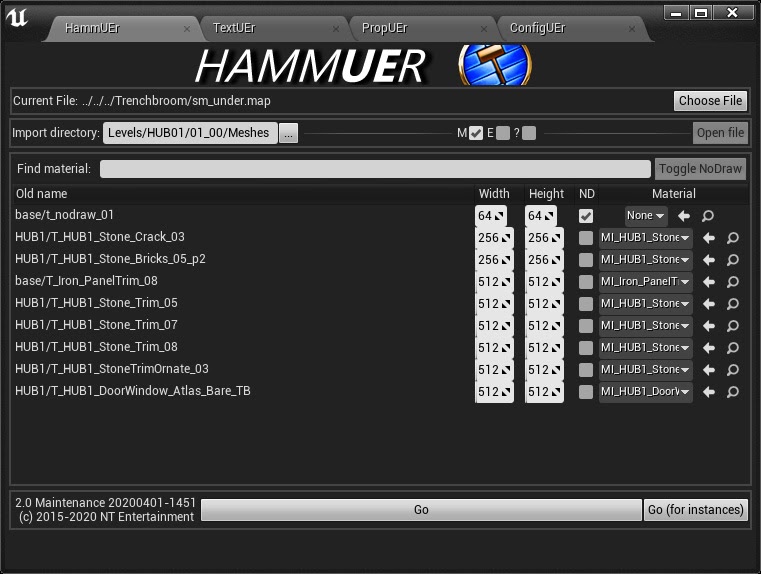
The TextUEr can bring in WAD files (collections of textures). However we use folders of individual TGA textures for Trenchbroom to look directly at Material Instances in UE4. The main thing about importing texture is having a Master material (Source Material) for Hammuer to create all the Material Instances for. This can be as simple as a Texture parameter plugged into the BaseColor. It's all up to your project needs.
The connection that HammUEr creates between textures outside UE4 and Materials in Editor is also saved in the hammUErPlugin.cfg. Similar to config settings, once these are setup, HammUEr remembers them for speedy re-imports. On Graven, we don’t use the TextUEr tab as we manually add the textures to the hammUErPlugin.cfg file when new textures are created. We found that this is workflow proved more efficient over multiple level designers using all the same files.
Material
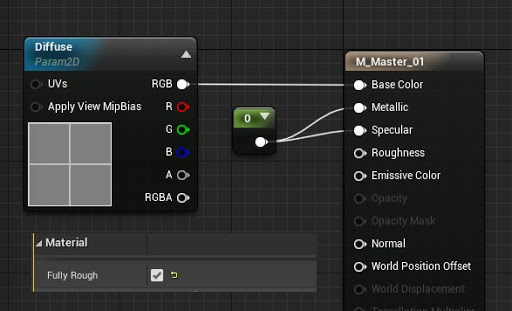
The most basic Master material needs a Parameter 2d plugged into Base Color, set to Fully Rough, and a 0 plugged into Metallic and Specular. Our Master has much more information in it, as should any good Material for instancing across a project.
Textures
If you want the pixelated, no filtered look. In a texture's detail tab, set the Filter to Nearest. If you want to do this to many textures at once, select all the textures in Content Browser, Right click, Asset Action, Bulk Edit via Property Matrix.
HammUEr
Click Choose File and select the .MAP file you wish to import. It's name will appear as the Current File. Set the import directory to wherever you want the map's files to be. This will automatically create a Meshes subfolder of that where all Brushes from Trenchbroom will be converted to Static Meshes in UE4 A full map could have thousands of brushes. For performance reasons you do not want that. Each brush becomes a custom mesh unless grouped in some form, such as func_group. Then all of those brushes will be grouped into a single static mesh. You can potentially do this for the whole level and be a single mesh. This is OK for blockouts, but not for a final level. Only the M checkbox needs to be activated as we'll just be bringing in the brushes.
In UE4, File, New Level. Default is usually a good starting place for testing as it has a Player Start, Sky Sphere, Lighting and fog already setup. For Graven, we built our own version of this for the gloomy atmosphere of the swamps and included other important things such as LightMassImportance Volume.
Trenchbroom
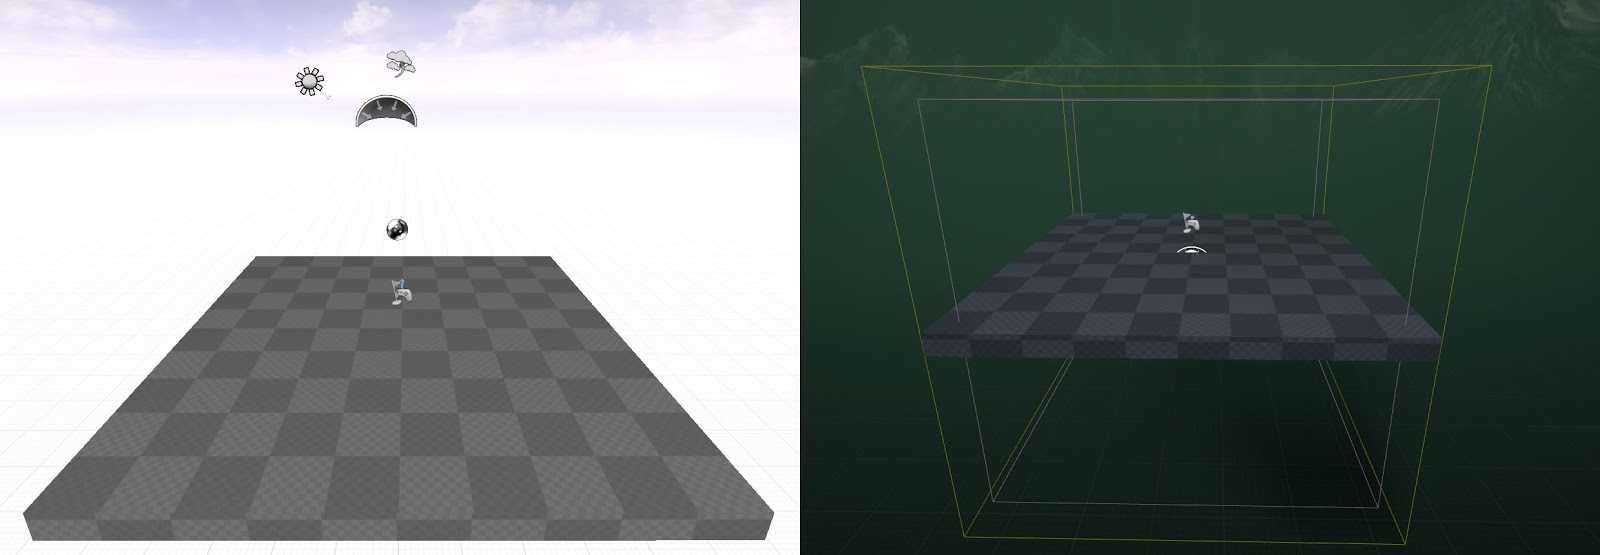
There’s a few ways to handle the level design process. In our development pipeline, all levels begin as a blockout. This is simple geometry with grid textures. This gives level designers the opportunity to work in rapid iterations to test elements such as runtime, scale, and other gameplay with other team members before the detailing process.
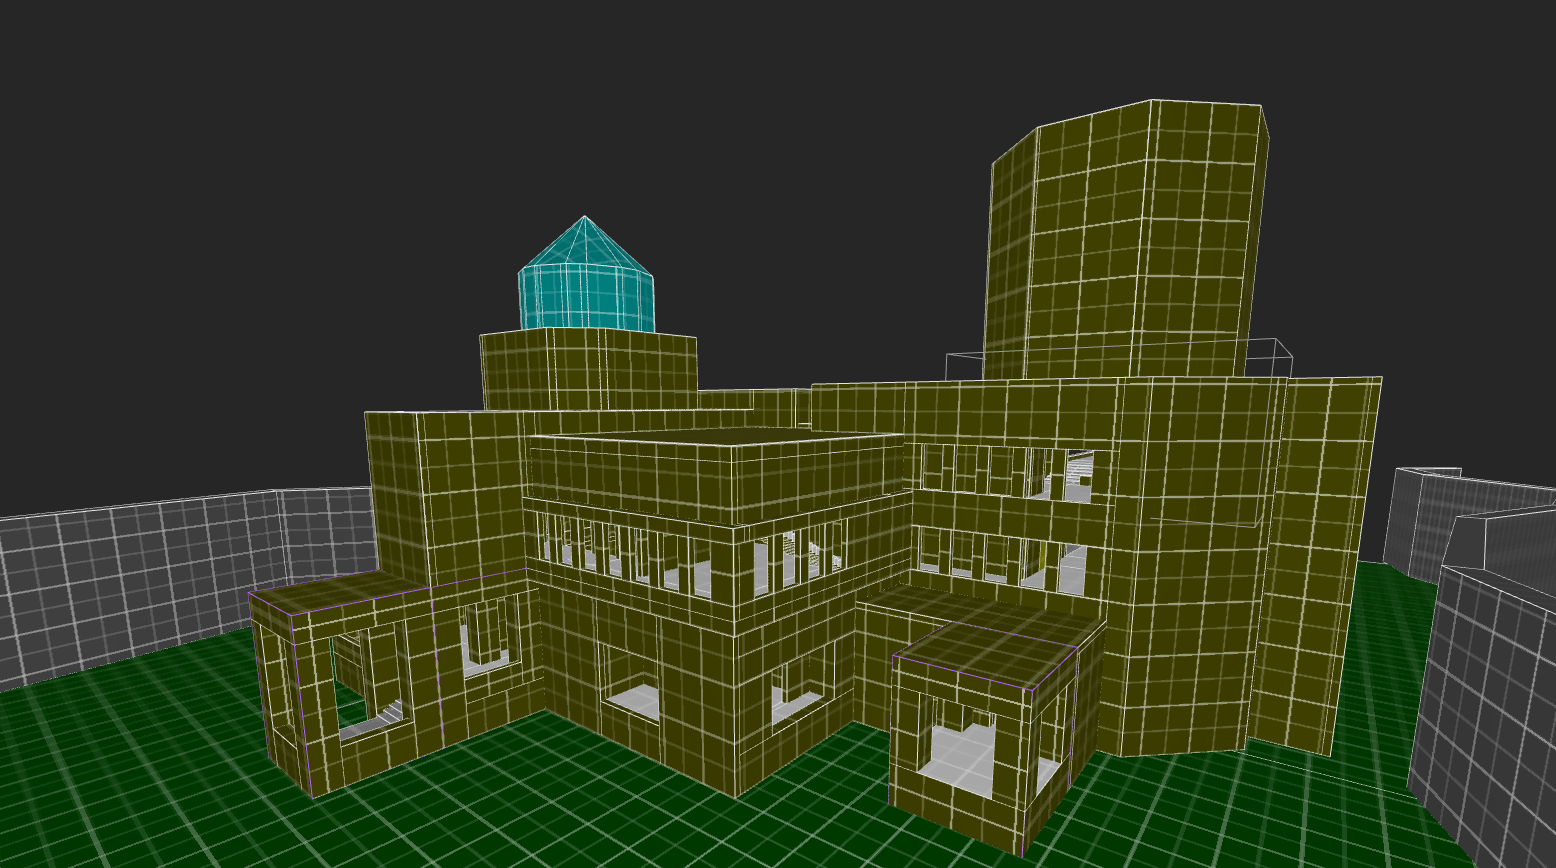
An example of a blockout level:
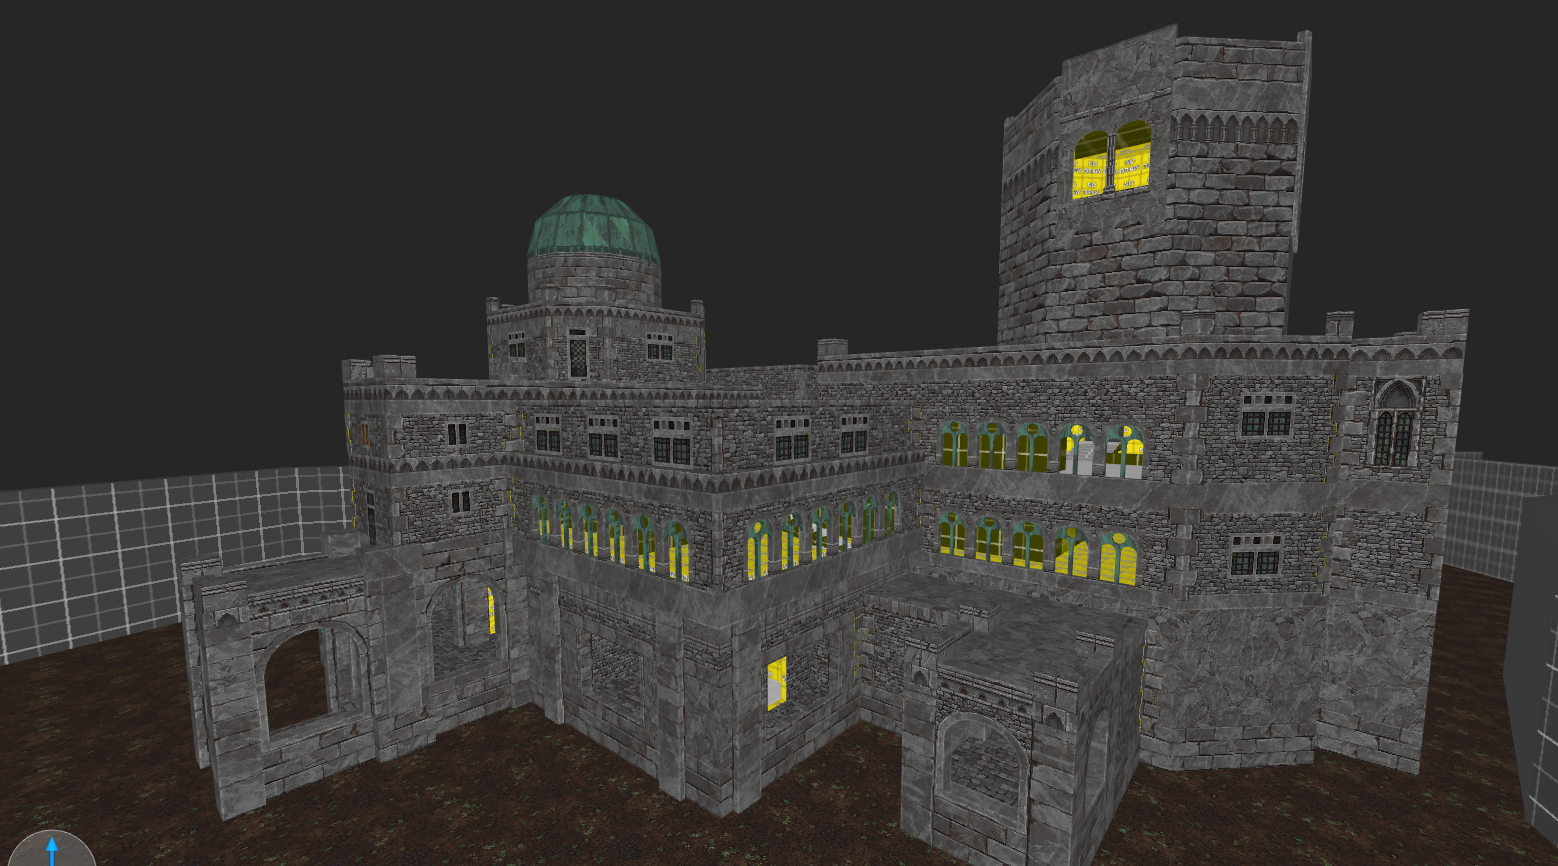
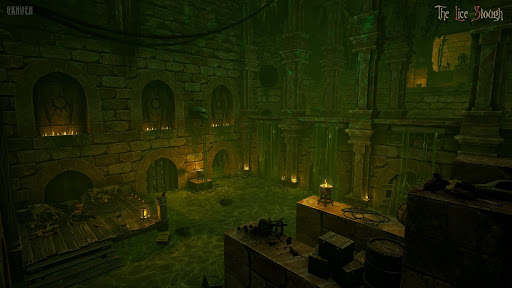
And the more completed version:
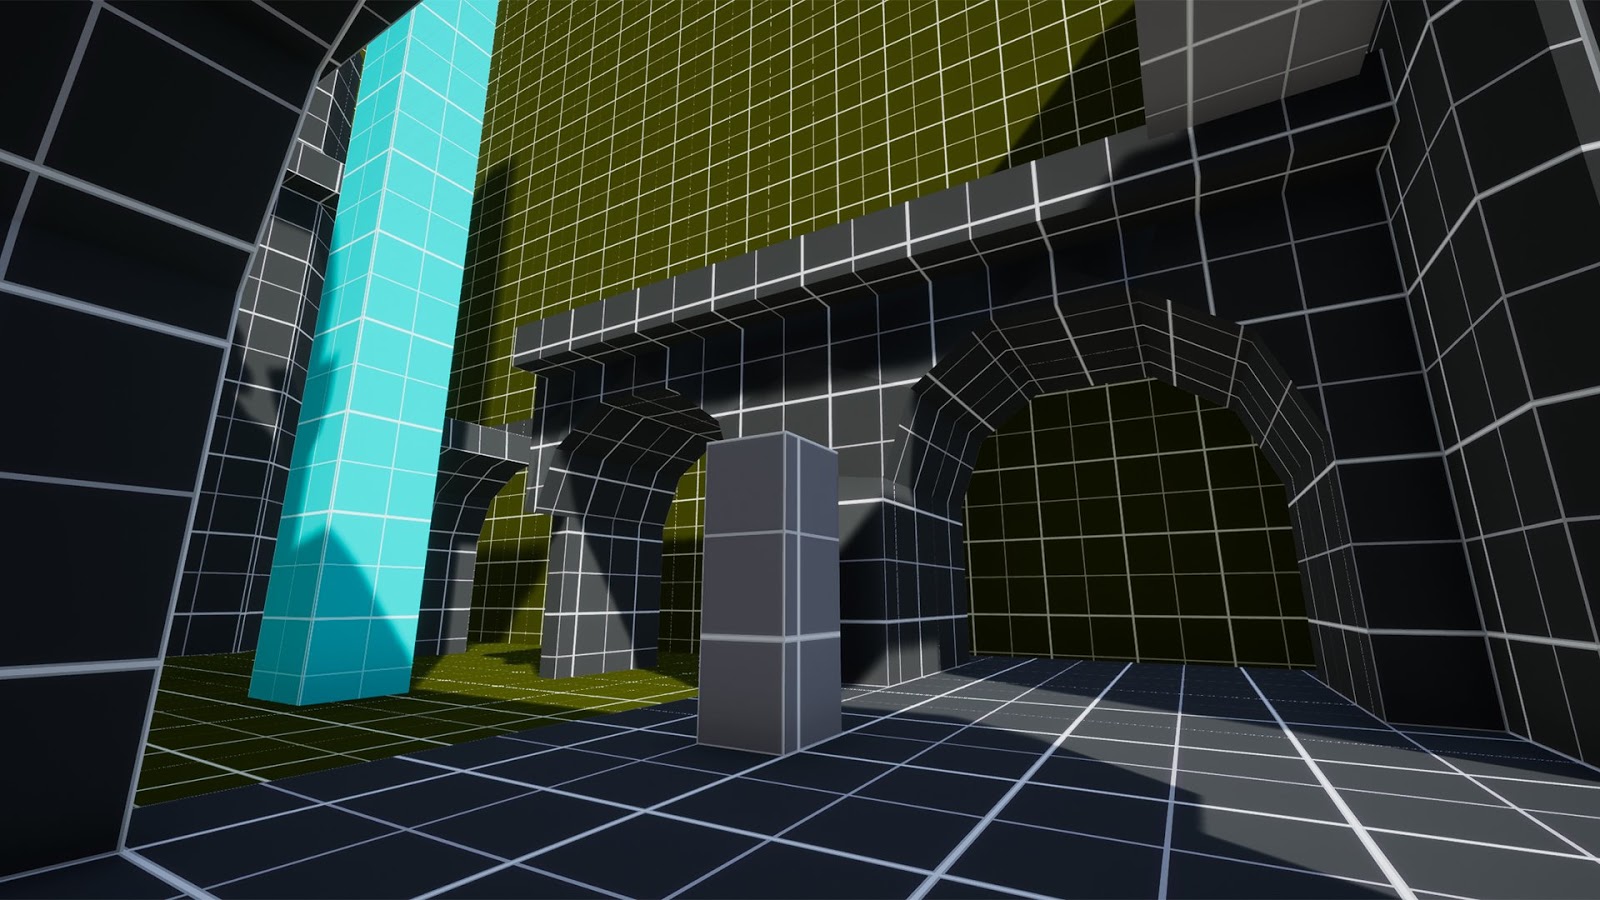
Traditional Building
For those more familiar with building Quake maps they can be created almost exactly the same way. This involves building almost all the geometry (walls, floors, trims, arches, etc.) in Trenchbroom to a near complete state from blockout to final Trenchbroom work. From this point, all final detailing via set-dressing, lighting, fx, etc. would all be done in UE4. These images show a blockout to a more detailed, but still a long way from complete level.
Modular Design
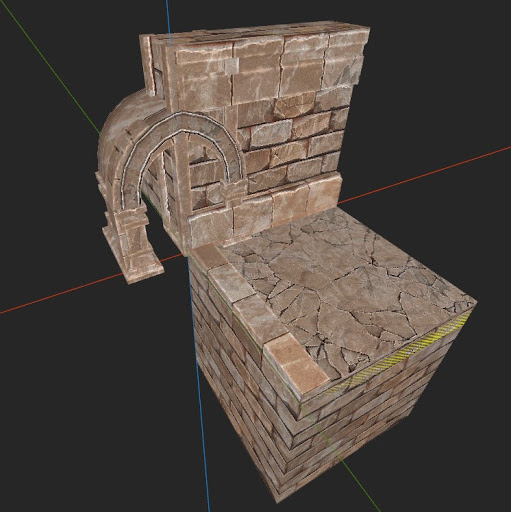
Since each brush becomes a custom static mesh, details only need to be created once and duplicated around the level in UE4. For example, levels usually have consistent details, such as arches, doorways, etc. Planning what should be modular pieces is as simple as breaking down the blockout into building blocks, similar to Legos.
For example, here’s a modular kit (in Unreal) built for the underground area of the first town.
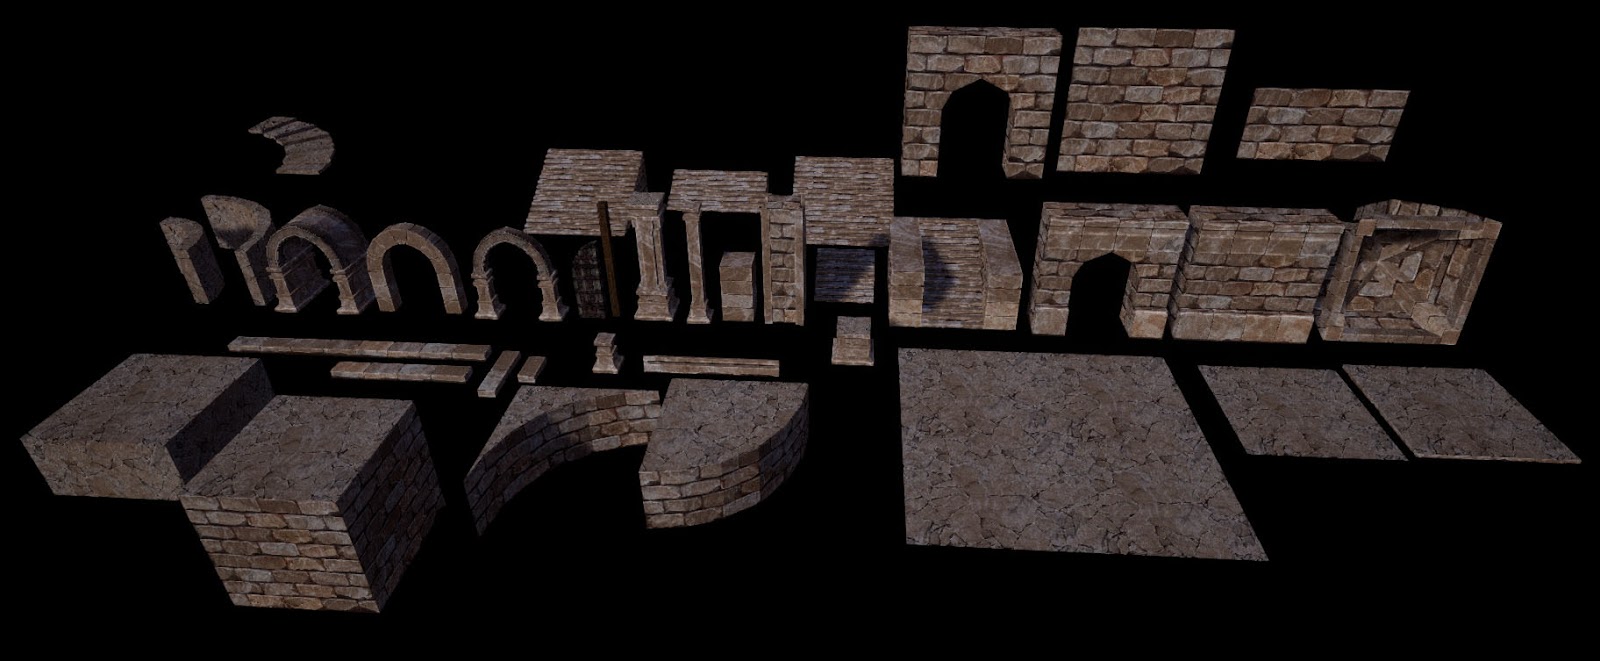
These pieces were all created in Trenchbroom. For importing purposes all of them are placed at origin (0,0,0) in Trenchbroom where we want the pivot point of the static mesh version in UE4. The final before export appears as a pile of brushes.
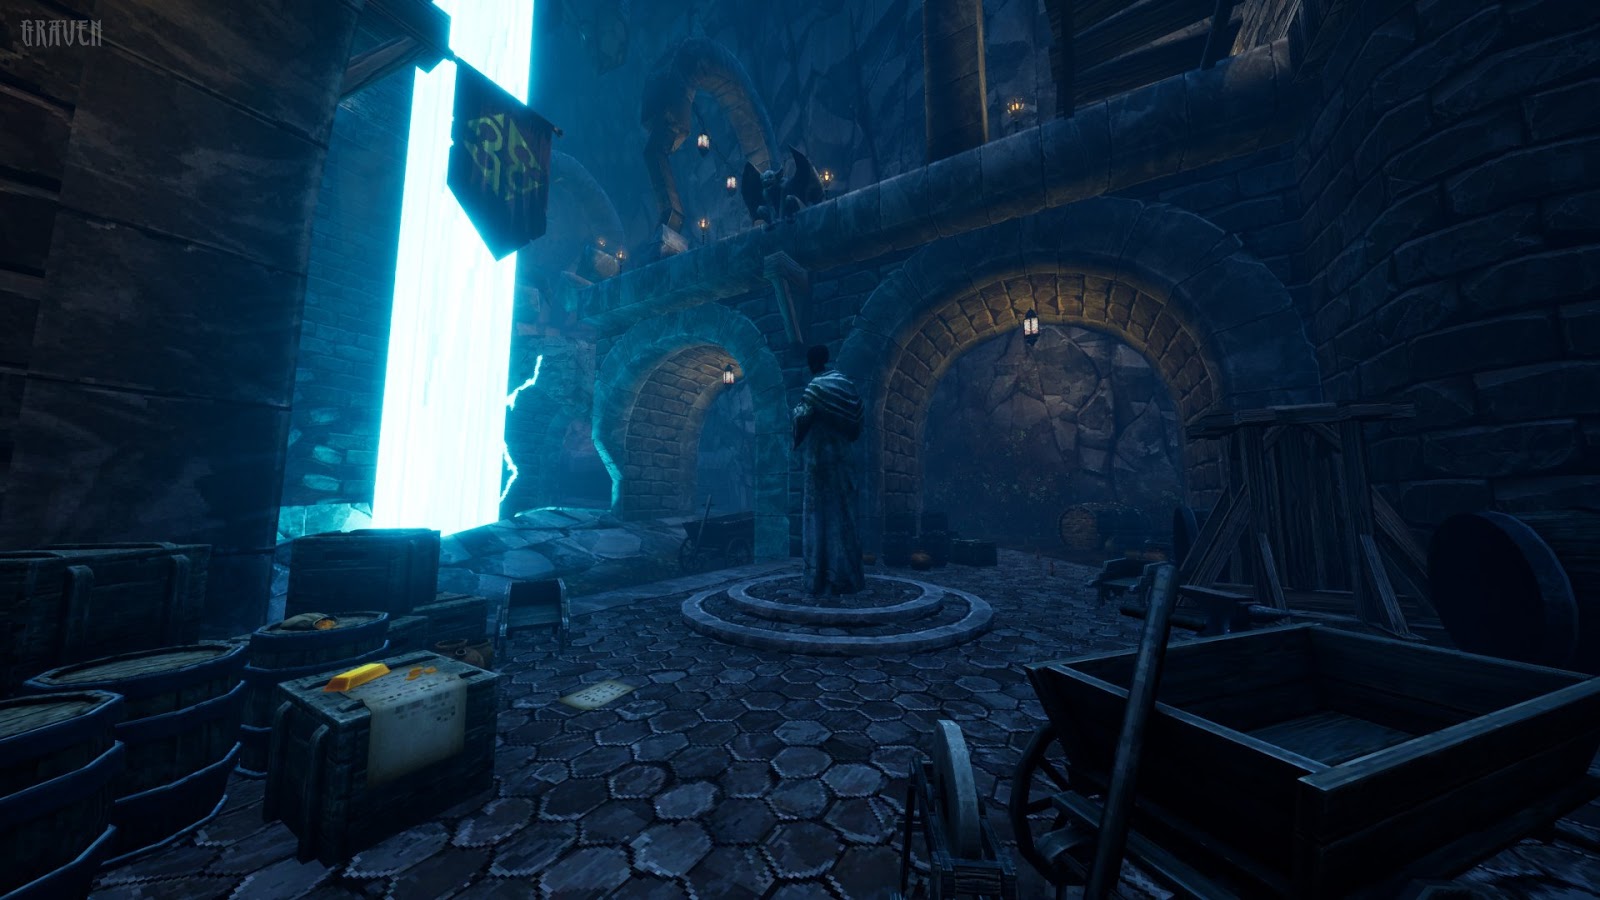
The end result is very efficient, snaps to grid and can easily be adjusted in UE4 for minor or even major changes to level layouts. A more final result with proper set dressing:
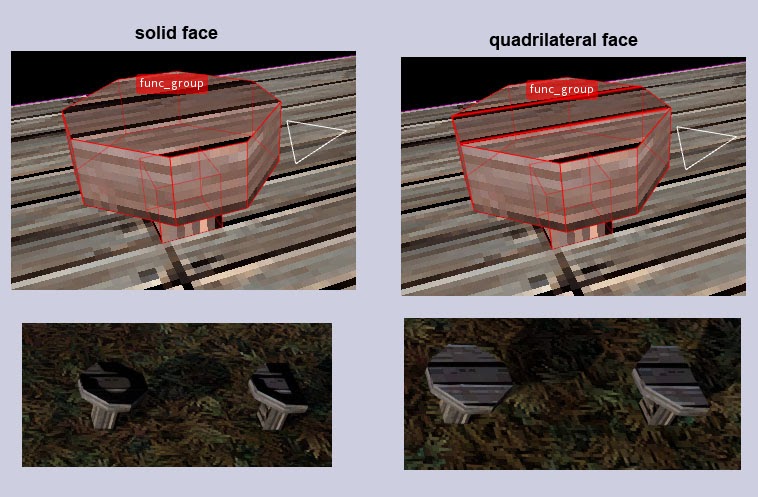
NoDraw Surfaces
In the earlier images of the HammUEr importer, one of the textures was called nodraw and had the ND next to it checked. When importing any material can be told to no draw. This tells HammUEr not to create the triangles of that face. This is critical to performance for keeping triangle counts low and removal of inside faces which would take up valuable LightMap space.This example shows simple Trenchbroom terrain made of many box brushes and the imported version with all of those nodraw surfaces removed. It’s automatic, and a huge timesaver. When creating new detail pieces in Trenchbroom it’s often best to set it to all nodraw, then apply proper textures to surfaces that need it. This way you don’t have to explode the brush work and look for every inside face that needs nodraw. We also have a checkbox in Trenchbroom for rendering these nodraw surfaces in the editor which can be set to a hotkey. This is great as having many nodraw surfaces on a complex piece can cause a lot of overlap, making them easy to miss when cleaning up brushes.

Keep It Simple
HammUEr often does not import odd shapes and has a real hard time with lightmapping them. Always build out of simple box shapes and/or remember to cut up shapes into rectangles and triangles. This image illustrates how an eight sided face does not properly lightmap.
Shapes with odd angles can sometimes cause issues that can be corrected with “Error correction range” in the ConfigUEr tab. Going off grid can also lead to faces not importing. Always remember to snap your verts in Trenchbroom. You can always rotate anything to your will in UE4.
Test early and test often. You don’t want to have a whole level build and find out it crashed on import due to one odd piece. They can usually be hunted down by breaking a level into chunks and importing those pieces until the error causing brush is discovered. This is a huge time sink, however, and you’ll want to avoid this at all cost.
Other Tools
It’s common on Graven for designers to spot fix pieces with a 3d modeling tool such as Blender or 3dsmax. There are limits to what Trenchbroom and HammUEr can do. Sometimes one needs more control of smoothing groups, UVs or want to create a more organic shape that can be easier for one to achieve in a 3d modeling tool.
Conclusion
Overall, we’ve been very happy with the results so far. It’s been a huge learning process of documentation and finding solutions across different developers. It’s a lot of work making sure everyone is on the same page as the pipeline was updated on a day-to-day process when we started. Now we’ve reached a point when new designers are introduced to the pipeline we can step them right through it, with many examples of what to do and what not to do before they run into those issues. We’re excited to continue the development of hope you all enjoy GRAVEN!
Wishlist GRAVEN on Steam and GOG!
By Chris Holden - Lead Level Designer